Top tips for miking your guitar amp
To record your guitar you just need some knowledge, a good microphone, and the advice in this guide on how to mike your guitar amp.
What to consider when recording a guitar?
When miking a guitar amp, you have to have certain considerations to take into account, let’s see the main ones.
- Microphone or microphones that we will use
- Microphone types and differences
- Impact of microphone polar patterns
- Microphone placement and placement
Let’s see each of the points in more detail.
Types of microphones
- Dynamic
- Condenser
- Ribbon
Let’s see the main characteristics, advantages and disadvantages of each type of microphones.
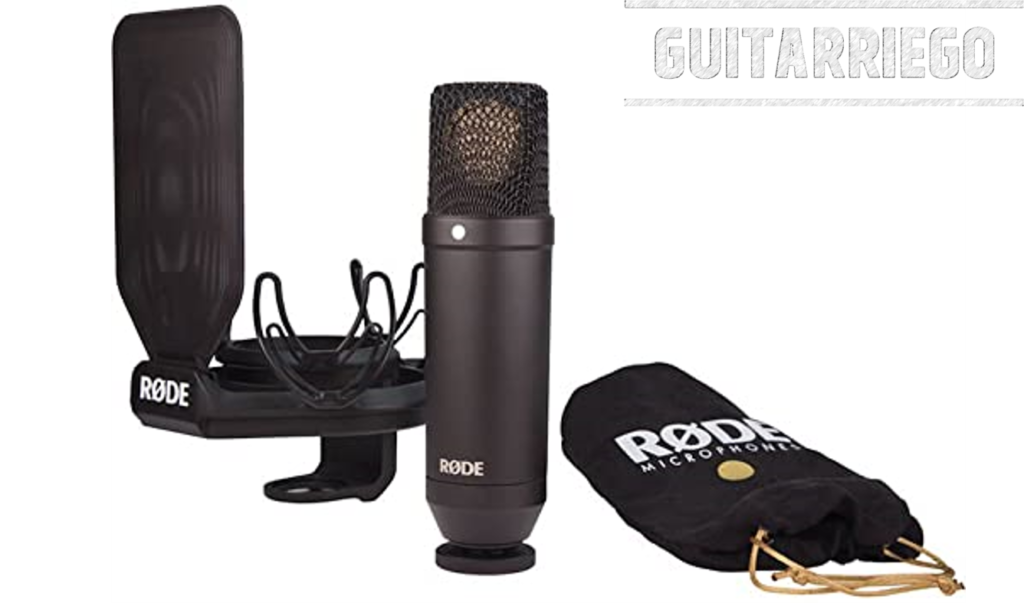
Dynamic Microphone
When it comes to all-purpose microphones, dynamic microphones are the standard. They are suitable for vocals, drum recordings, ideal guitar amps, and just about anything. The reason for this is due to its rugged construction and its ability to handle high sound pressure levels (SPL).
Dynamic microphones are robust and relatively inexpensive compared to other types of mics. The most popular and widely used microphone is the Shure SM57. It is a market standard, with an excellent price / quality ratio. Hundreds of classic and iconic songs have been recorded with the SM57.
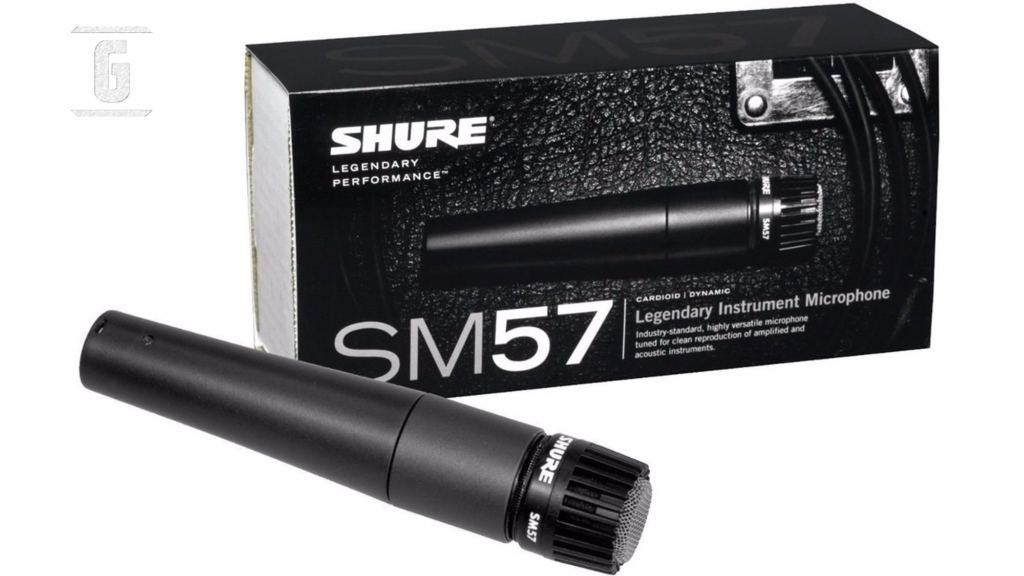
Advantages and disadvantages of dynamic microphones or dynimics
Advantages: They are prepared to withstand high levels of sound pressure without problems. Ideal for miking guitar amps. Are cheap. Also, they do not require phantom power -Phantom power-.
Disadvantages: They don’t have the level of detail and frequency richness of condensers, which is not always a bad thing.
Condenser Microphone
Condenser microphones are more sensitive and offer a little more nuance throughout the frequency range, accentuating certain aspects of an instrument’s tone that may be missing from a dynamic microphone. This is due to the sensitivity of the microphone and the ability to capture greater detail over a wider frequency range. For vocals and acoustic instruments, they are much more favorable. They require Phantom Power, which gives the signal a slight boost.
Condenser microphones withstand high sound pressure levels, but are slightly more sensitive than dynamic ones. Exposure to strong SPL can break the microphone. Because of the foregoing, greater care and consideration must be taken with regard to microphone placement. Also, capacitors tend to be a bit more expensive than dynamic ones, but without being extremely expensive.
Advantages and disadvantages of condenser microphones
Advantages: They are designed to have a high level of detail in all frequencies, providing more bass, mids and treble. They are prepared to withstand high levels of sound pressure although they have a certain limit. Excellent for clean, acoustic audios.
Disadvantages: it may not be a disadvantage, but to work they need phantom power -Phantom power-, that is, to be connected to 48 volts. For saturated audios they can be too detailed.
Ribbon Microphone
Ribbon technology can be traced back to the early days of microphones. Ribbon microphones are acclaimed for their warm vintage sound. They are perfect when you need to round off excessive highs. Ribbon mics naturally produce a perfect eight directivity pattern – explained below – and respond well to equalization.
Although today’s ribbon microphones are not as fragile as they used to be, they are still easier to damage than dynamic or condenser microphones.
Another important issue is that with ribbon microphones you never have to use 48v phantom power. That can ruin the tape.
Advantages and disadvantages of ribbon microphones
Advantages: they are considered the best for vintage audios. They allow for sweet, round high frequencies. Also, they do not require phantom power -Phantom power-. They capture the audio or ambient effect.
Disadvantages: they require a high level of preamp gain, if you don’t have a good preamp in your audio interface, it will get very noisy. They are extremely expensive. They do not support high levels of sound pressure.

What impact do the polar patterns of the microphone have?
The polar patterns indicate from where or which zone the microphones pick up the signal. This can make a big difference in the record of the recording you capture. Each microphone has a unique polar pattern, which is the direction in which sound sources are captured.
Thus, a microphone that is highly directional will be more focused, reducing the area from which it picks up sound. If it is omnidirectional, that is, it picks up sounds from everywhere, then it will pick up sound waves from the sound source, as well as reflections or bounces from surface areas around the room, room or environment.
Normally, for the recording of guitars, one seeks to obtain almost exclusively sound from the cabinet, which is why the directional ones are the most used. However, in set-up environments such as studios, microphones that also pick up ambient waves can be used to achieve other audios.
Types of polar patterns
Cardioid or directional patterns
In the simplest terms, cardioid patterns are directional and pick up sounds directly in front of them. Dynamic microphones like the SM57 are a great example of this. Supercardioid and hypercardioid microphones further reduce focus. If you don’t want to pick up sound from the room or environment, then cardioids are the way to go.
Omnidirectional
Omnidirectional microphones are great for remote microphones and picking up sound in the room or environment, allowing for richer audio as long as the ambient sound is controlled. It also serves to record different instruments without the need for a microphone for each one. Used in conjunction with a cardioid microphone, as a close-up microphone, the omni offers subtle ambient balance for more complete capture of amp response within the room or environment.
Bidirectional or “Figure 8”
The bi-directional microphone captures audio from the front and rear, but not from the sides or sides. It is also called a “Figure 8” because of the shape of the pattern. Thus, it can pick up the sound source directly -in front-, as well as reflections of the sound bouncing off the wall -back-. To get some ambient or room audio in your recording without using a two-mic setup, directional and omni, will work fine.
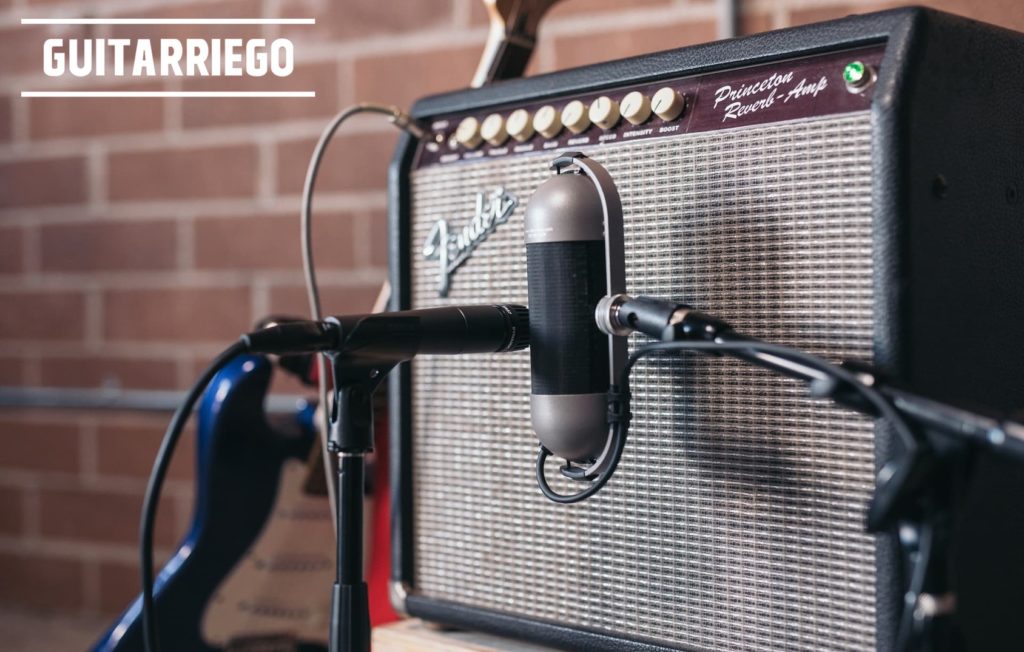
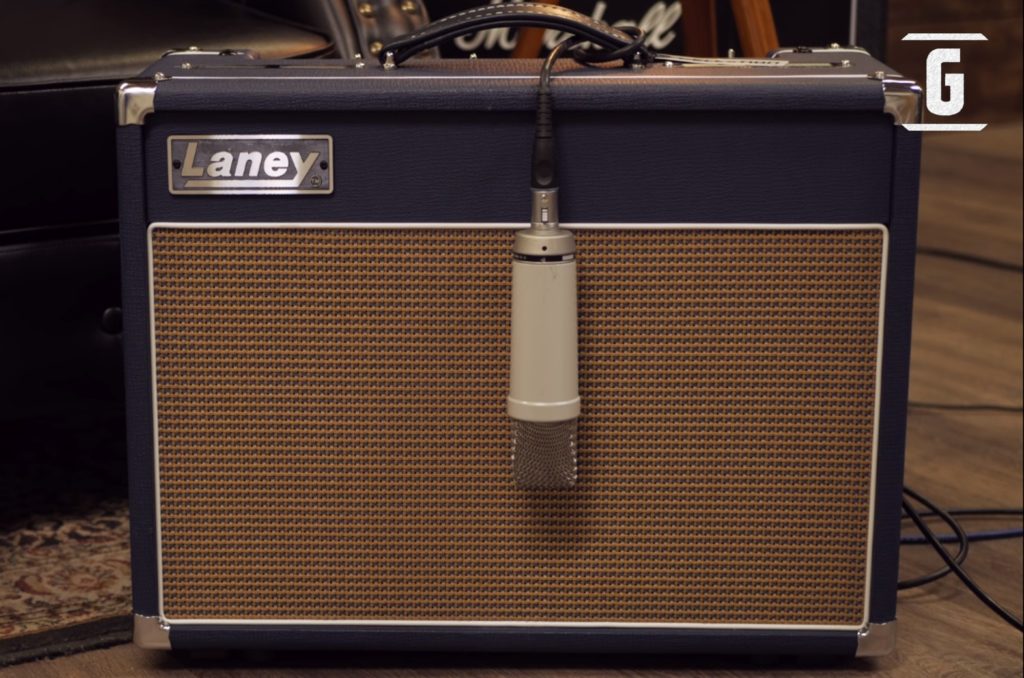
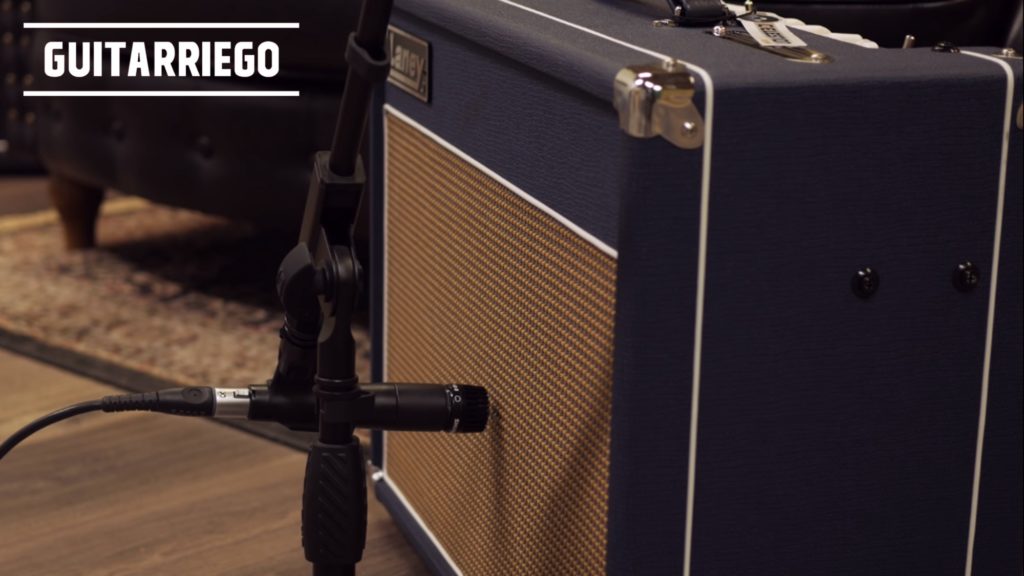
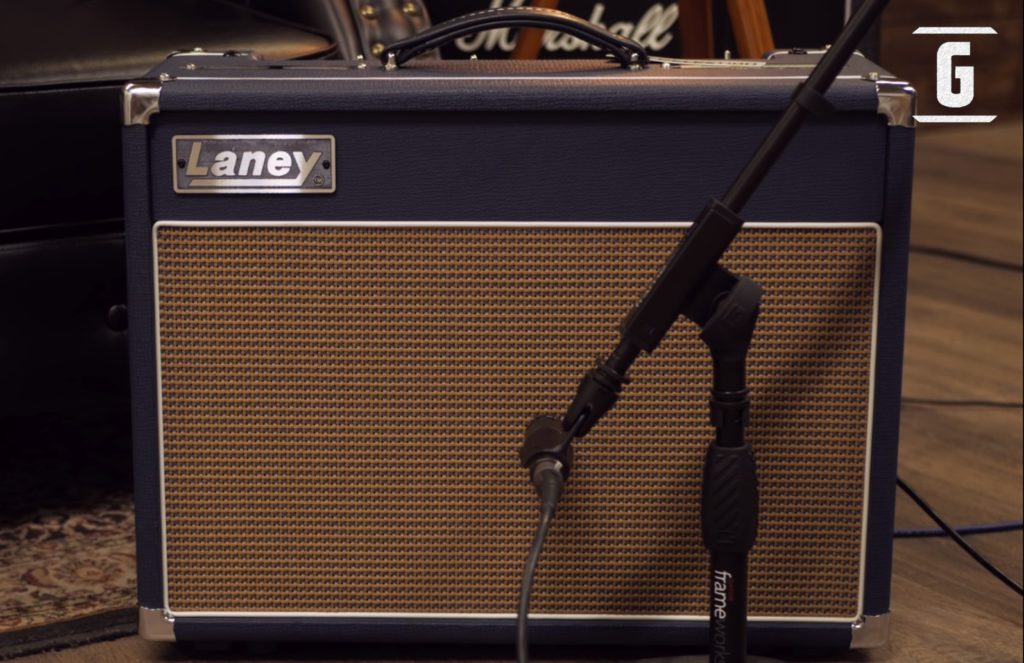
How to place the microphone in front of the guitar amp?
When it comes to placing the microphone in front of the guitar amp, there are a few recommendations to consider for good miking.
In the center of the speaker is the sharpest audio, and the further you move away from the center, the rounder the high frequencies will be. On the other hand, the closer to the speaker, the more bass and bass you get, the farther away, these are diluted, at the same time, the more ambient sound you will get.
Tips for locating a microphone with a cardioid or directional pattern:
- Point the microphone at the speaker that sounds best. It might sound silly, but in a 2×12 or 4×12 cabinet there is likely a speaker that sounds better than the others.
- Aim the microphone midway between the center of the speaker cone and its edge, leaving a gap of approximately 1 cm from the edge of the microphone and the speaker grill.
- When you want to reduce the bass response, move the microphone away until you find the sweet spot.
- To increase the mid to high frequency response, move the microphone closer to the center of the speaker cone.
- If you’re looking to lower the mids, move the mic toward the edge of the speaker.
- Don’t be afraid to move the microphone – experiment with different positions and distances to find your perfect location. But these movements must be small since the variations are large.
- If you have the option, use a looper while making adjustments to the microphone position. In this way, you can have a real-time reference on the changes in the response of the microphone.
Try everything but break the mic
There is nothing right or wrong when it comes to miking your amp, except when it comes to overdriving the mic due to too high SPLs.
Related Articles: Top 9 tips to improve your tone with your amp.
For more information and other tips, head over to Guitar Quarter.
You can share opinions or also chat about this and more with other musicians in our comments section.